Your shopping cart is currently empty.
| Subtotal | €0,00 |
| Shipping Rate | including VAT, excl. Shipping Rate |
| Total | €0,00 |
|---|


04.09.2023
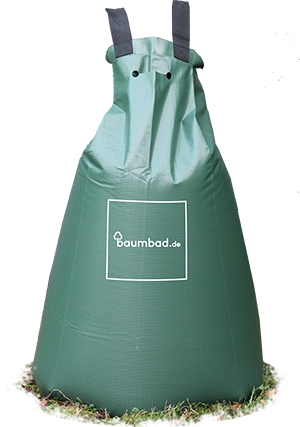
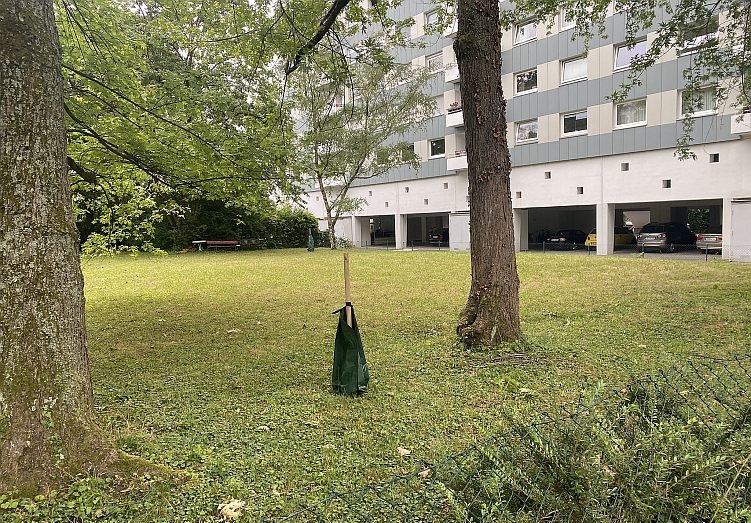
Can tree bath tree bags be repaired? Yes! And the more, the better!
We therefore ask you not to simply throw away the irrigation bags. In addition to the repair, there is also a recycling program for damaged bags. In this your bags will be repaired and donated by us, or the bags will be closed repair kits processed, which we make available to you free of charge if you want to repair your bags yourself.
This is exactly why we have developed the following instructions. The tree bath bags can be repaired because they are made from an elastic PVC material that is also fiber-reinforced for use with trees. PVC is also used in inflatable boats and many inflatable playmates for swimming pools or lakes are also made of a similar material. This means there are numerous adhesives and repair kits that you may even find at home.
In our repair instructions we have tested a wide range of common household glues, materials and repair sets (mostly for inflatable boats, as these are also made of PVC) in order to keep it as simple and environmentally friendly as possible. If you don't find anything in your home, we have also included a list of our recommendations at the end. These can be purchased in many discount stores, hardware stores or online. So together WE can save as many bags as possible and save resources!

Given the multitude of options, we would like to tell you about our experiences with the repair and show you what was particularly suitable and what we cannot recommend. We also recommend that you read the instructions completely first, as there are a few things to consider and only then start the repair using the instructions.
Table of Contents
8 ways to fix a tree bag.
What is the best way to repair a tree bag?
What didn't work to fix the bags!
What worked to fix the bags!
Tree Bag Repair Instructions (Short Version)
Overview of the work steps
Detailed repair instructions including tips
Why does it happen that tree bags need repairs?
Tips for a long life
An overview of the eight tested adhesives and materials.
Conclusion on the topic of repairing tree bags yourself
Tree bath repair kit
8 ways to fix a tree bag.
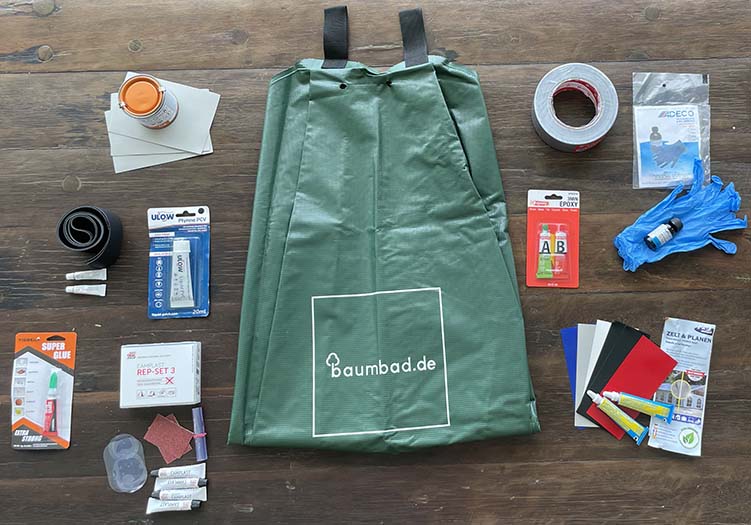
We once searched our home and the internet looking for products that might be able to repair a tree bag. The idea arose from the idea that it would give you the opportunity to see whether you already have something at home and not have to buy something new to repair your defective tree bag. We came across the following 8 repair options. The prices for the individual options are between €0,99 - €19,99. We are aware that for the price of some of the sets it is possible to buy a new bag. But that's not exactly the point. We want to work with you to repair as many tree bags as possible! If you can already find something to repair at home, this would be the ideal case for repairing your defective bag in a resource-saving and environmentally friendly way.
- superglue - (approx. 1 €)
- M3 duct tape / fabric tape - (approx. 2 €)
- Liquid PVC glue (Liquid PVC) - (approx. 11 €)
- vulcanizing glue (tent and tarpaulin repair kit) - (approx. 17 €)
- Two component adhesive (AB adhesive) - (approx. 2 €)
- Inflatable boat PVC repair kit - (approx. 20 €)
- Repair kit for inflatable rubber toys - (approx. 13 €)
- PVC tape - (approx. 17 €)
It is also useful to use the following tools:
- Gloves
- Lubricating gel/sandpaper
- Brush (for distributing the glue – included in many sets)
Spoiled for choice! What is the best way to repair a tree bag?
First we have our tests on the famous M3 duct tape (tissue tape) thought. My grandfather used it to repair all sorts of things. You might also remember the silver tape.
Unfortunately, we were unable to apply enough adhesive strength to hold back the water. It always found a way to get out of the bag at various points on the tape. This can also be due to the pressure with which the water presses in the bag. Therefore, the M3 adhesive tape is not suitable for us to repair tree bags.
Next, we took a closer look at the various repair kits. These usually consist of an adhesive and various patches as well as gloves or other tools for applying the adhesive. The material of the repair patches from most repair kits is very different from the material of the tree bags. It has been shown that the fiber-reinforced PVC material of the baumbad watering bags does not work well with the PVC for inflatable boat or inflatable toy harmonizes.
This is because inflatable boats use a PVC that is significantly thicker than the tree bags. Inflatable boats or rafting boats have to endure a lot when they race over stones and other obstacles in the river. Also, boats are always about human lives, which means that very thick and stiff material is used.
In inflatable toys, the processed PVC is much thinner and softer than in the tree bags. After all, it should be as light as possible and easy to transport, even for children.
As a result, the materials differ so much overall that the repair kits don't stick to the tree bags.
What didn't work to fix the bags:
The PVC tapes and M3 armored tape didn't last. Not even in larger quantities. Therefore, we cannot recommend them for repair.
We also cannot recommend the patches from the repair kits to use for boats or inflatable toys to fix a tree bag.
Here is a video where you can see how the different glues and materials adhere to the tree bag.
What worked to fix the pouches:
All other tests have shown that the recycled patches (i.e. patches made from the same material as the baumbad tree bags) hold best and stay tight, regardless of which adhesive was used in the test.
Should you PVC glue, instant glue, 2-component glue, vulcanizing glue or similar glue that can stick plastic, nothing should stand in the way of a successful repair.
To make it even easier for you, we have documented the repair with liquid glue step by step for you and summarized useful tips for you.
Step-by-step instructions for tree bag repair with a liquid glue and patch:
The repair process was similar for the different adhesives. In this example we used superglue and a piece of PVC patch from the recycling program.
The use of the patches is particularly recommended for damage such as cuts or holes in the middle area of the tree bag. A repair to the outer weld seams is initially not considered here.
We always used gloves when handling the glues to protect our skin. You should also always read the associated instructions for use before using adhesives. This always includes the drying times and safety instructions.
Important: Before repairing, the area of the tree bag to be repaired must be thoroughly cleaned. This must be free of dust and grease so that the liquid adhesive can adhere well.
Overview of the work steps:
- roughen the bag
- edit patches
- apply glue
- Bring patches and pouch together
- let dry

Repairing tree bags with liquid glue with useful tips in detail:
Step 1 - Prepare the repair site

First, the area to be repaired is thoroughly cleaned and then the area for the patch to be stuck is roughened.
You can see damage caused by an incision. We cleaned the bag 2-4 cm around it and then roughened it with sandpaper (grit 80-200). It is important to remove only a small amount of material so that the bag is not further damaged.
Tip: Roughen the tree bag slightly and the patch more heavily. This also prevents further tearing. The roughened area should be larger than the patch used.
Step 2 - Selecting/cutting the patch

After preparing the bag, a suitable patch is cut or selected. The patch should be larger than the damage. A patch size of 2-4 cm around the cut is ideal so that there is enough space all around for the adhesive and sufficient hold is created. This can also be a few centimeters more in the cutting direction.
Tip: It is important that the patch does not become too large around the damage, otherwise the bag will be more difficult to seal.
Step 3 - Apply glue
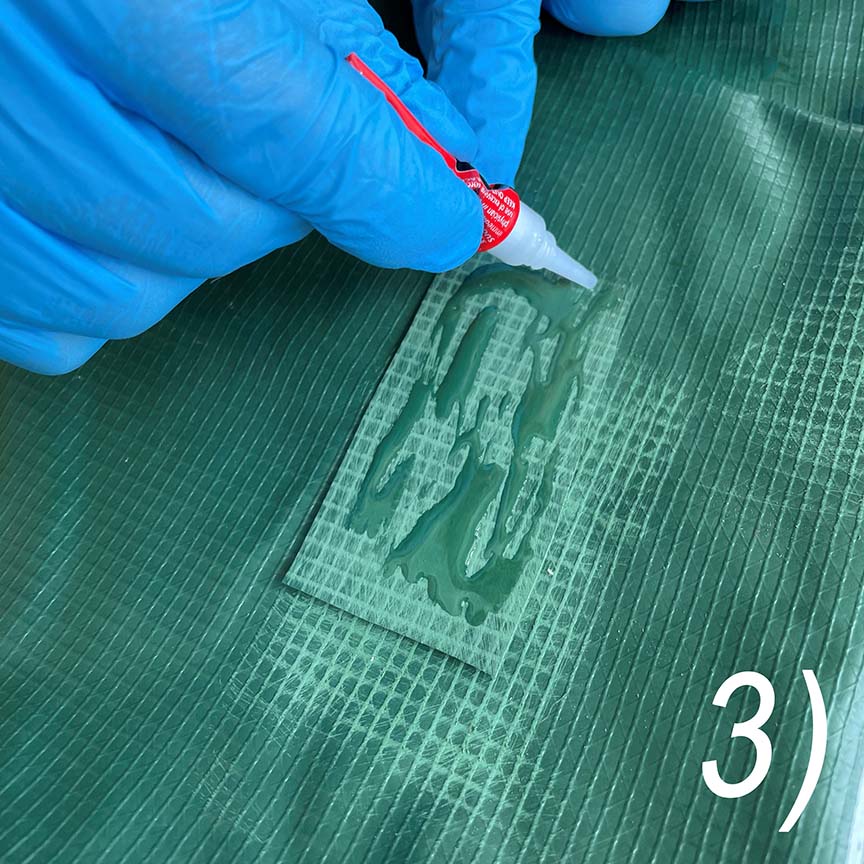
Next, the glue is applied according to the glue instructions.
Now the superglue is applied. Depending on which liquid adhesive is used, there are various things to consider. At the bottom of the article we have also put together the advantages and disadvantages as well as tips for other liquid adhesives for you. It is important to spread the glue generously and neatly over the entire patch. Do not use too little glue, otherwise a leak may occur.
Tip: Superglues have the property that they harden in a very short time, but don't work in a hurry, they also need a certain amount of pressure for the process to start.
Step 4 - Applying the patch

Now the patch is pressed onto the bag. You can use your finger to spread the glue from the inside out so that the glue is spread over the entire surface. If the glue runs out, that's okay (just leave it there). It's better to have a little more glue than too little. But be careful with your fingers, some adhesives can start to stick very quickly.
Tip: The bag should lie on a smooth surface. Also, work calmly and calmly, then the result will be tight and you will keep your fingers clean.
Step 5 - Let it dry

The last step is curing, the drying time varies depending on the glue. It is best to refer to the operating instructions for your adhesive. If you distributed and pressed the glue well in step 4, most glues no longer require constant pressure.
Tip: To be on the safe side, you can always wait a day before putting the bags back around your tree. Don't just put something heavy on the patch, otherwise the object could get stuck!
Why does it happen that tree bags need repairs?
In daily use, there are a wide variety of things that happen to the tree that can have an impact on the lifespan of a tree bag. We have therefore listed the most common influences for you:
- improper handling (see instructions) with the pouch
- Damage from hedge trimmers
- Lawnmower or robotic lawnmower
- Vandalism
- Winter services sweeping snow
- Rodents, martens or other wild animals (usually only when it is very, very dry and they can no longer find drinking water).
- Weather influences such as storm, hail, frost or the sun (our bag has UV protection)
- Dogs that pee on him for a very long time
- Algae can clog the two holes after a long period of use
- Dirty water or impurities in the bag could clog the holes
- Fertilizer additives (depending on chemical composition)
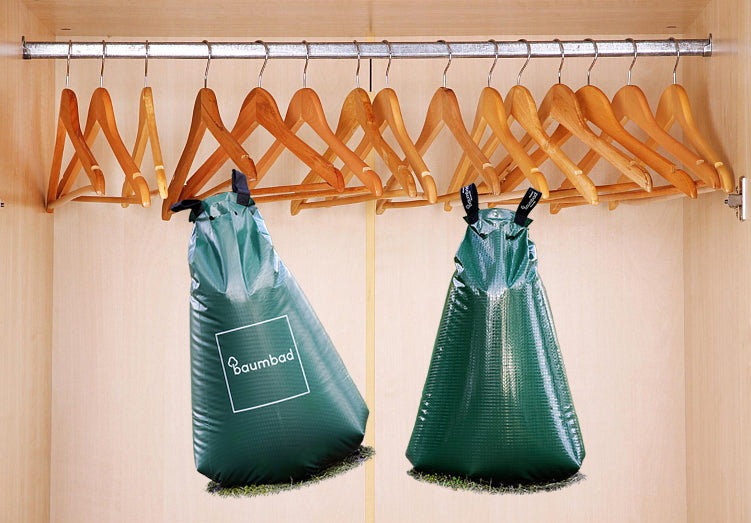
Tips for a long life
It is best to only use the bags in the phases in which they are needed and in the remaining time put them in a dry place, dried and cleaned, so that no algae form and the bag is protected. If possible, also avoid the circumstances listed above that reduce the service life. Then your tree bags will remain fully functional for a long time.
The eight tested adhesives and materials to repair a tree bag in the overview.
Finally, we have summarized the eight different repair methods for you and weighed the advantages and disadvantages. The order is not an evaluation of suitability, but simply arose from our research.
superglue
Description: The superglue is transparent, glues almost all materials together and can be dosed with pinpoint accuracy.
| Suitable for repair: | Ja |
| Price: | about 2-6 € |
| Classification: | Household glue |
| Suggestion: | Yes (inexpensive and often available at home) |
M3 duct tape / fabric tape
Description: Universally applicable fabric adhesive for a variety of applications such as light sealing, bundling, marking or temporary repairs
| Suitable for repair: | Ja |
| Price: | about 2-6 € |
| Classification: | Household glue |
| Suggestion: | Yes (inexpensive and often available at home) |
Liquid PVC glue (Liquid PVC)
Description: Liquid Patch - Liquid PVC black for patching holes or tears in inflatable boats.
| Suitable for repair: | Ja |
| Price: | about 12 € |
| Classification: | Professional glue |
| Suggestion: | only if available at home (high price) |
vulcanizing glue (tent and tarpaulin repair kit)
Description: Repair kit tent, inflatable boat, air mattress, repair kit, PVC tarpaulins waterproof, transparent.
| Suitable for repair: | Partly / only the glue is usable |
| Price: | about 18 € |
| Classification: | Professional repair kit |
| Suggestion: | only if available at home (high price) |
Two component adhesive (AB adhesive)
Description: 2-component adhesive glues a wide variety of materials such as ceramics, porcelain, glass, wood, stone, metal and various plastics to each other and to each other.
| Suitable for repair: | Ja |
| Price: | about 2-6 € |
| Classification: | Household glue |
| Suggestion: | Yes *Comparison winner (inexpensive and often available at home) |
Inflatable boat PVC repair kit
Description: 2-component polyurethane adhesive for PVC inflatable boats.
| Suitable for repair: | Partly / only the glue is usable |
| Price: | about 20 € |
| Classification: | Professional repair kit |
| Suggestion: | only if available at home (very high price) |
Repair kit for inflatable rubber toys
Description: For repairing minor puncture damage to tents and outdoor items with PVC, PU or fabric surfaces.
| Suitable for repair: | Partly / only the glue is usable |
| Price: | about 13 € |
| Classification: | Professional repair kit |
| Suggestion: | only if available at home (high price) |
PVC tape
Description: The repair kit is used to repair cuts and punctures on inflatable boats, rafts, kayaks, canoes, inflatable sofas and living quarters and water toys.
| Suitable for repair: | Partly / only the glue is usable |
| Price: | about 17 € |
| Classification: | Professional repair kit |
| Suggestion: | only if available at home (high price) |
Conclusion on the topic of repairing tree bags yourself:
We hope this post will help you repair your tree bag yourself. It has been shown that it doesn't take much to repair the tree bags if they are damaged. Most of us already have everything we need at home for repairs.
That's why we should all take advantage of the opportunity to repair before a bag is just thrown away.
If you still prefer to buy a new tree bag instead of repairing the defect, we would like to ask you to support us in our recycling program so that we can repair and donate the defective bags or process them into repair patches. Defective bags are also valuable resources. Let's not waste them.
We really enjoyed combining the different materials to find out what works. We also learned a lot about our products. We incorporate this knowledge into the newer generations of tree bags in order to make them even more durable and resistant to environmental influences. We are a young start-up that is constantly training and learning. If you come across a solution during your repairs that we have not tested or have additions, we would be happy if you share it with us and the #treeretter community. In this way, resources can be saved and trees can be optimally watered.

Tree bath repair kit for tree watering bags
You want to repair your watering bag yourself and need patches made from the baumbad material. Then simply send us an email with your postal address service@baumbad.de and we will send you a set with different sized patches free of charge in the coming days.
Do you want more tree knowledge?
That might interest you
Store tree watering bags and watering rings over the winter
If you store your tree watering bags at the end of the watering season, you can extend their lifespan...
Why the use of tree watering bags is worthwhile
The number of dry periods and hot days has been increasing rapidly for several years. Especially young...
Great idea, easy handling and everything from ordering to delivery.
Michael K.